
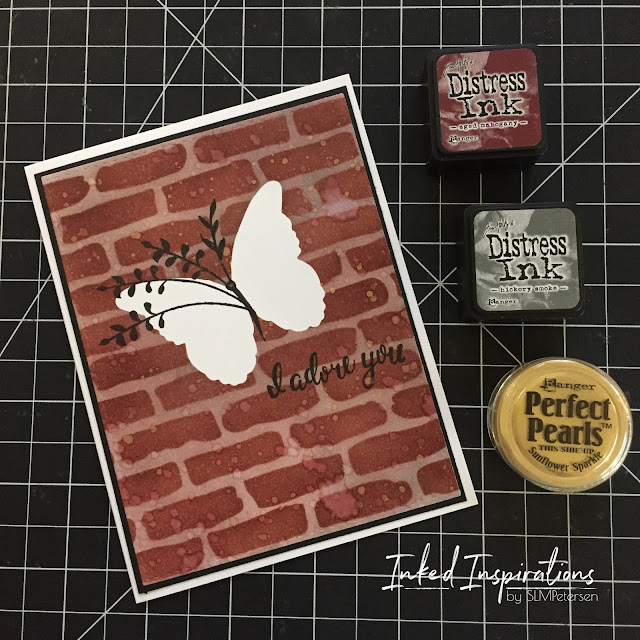
The first brick background I created in 2018. I masked the white butterfly with a Post-it note mask made from a butterfly die cut, then laid the brick stencil over the top. I applied Distress Inks in Aged Mahogany and added a bit of shadow with Hickory Smoke. I removed the bricks and added a light layer of both inks to tone down the white of the grout. Splatters of water and splatters of Perfect Pearls in gold were added before removing the butterfly mask. I drew on a few branches, some to represent antennas, and added the butterfly body. From there I stamped the sentiment, matted the panel on black, and then adhered it to a white card base.
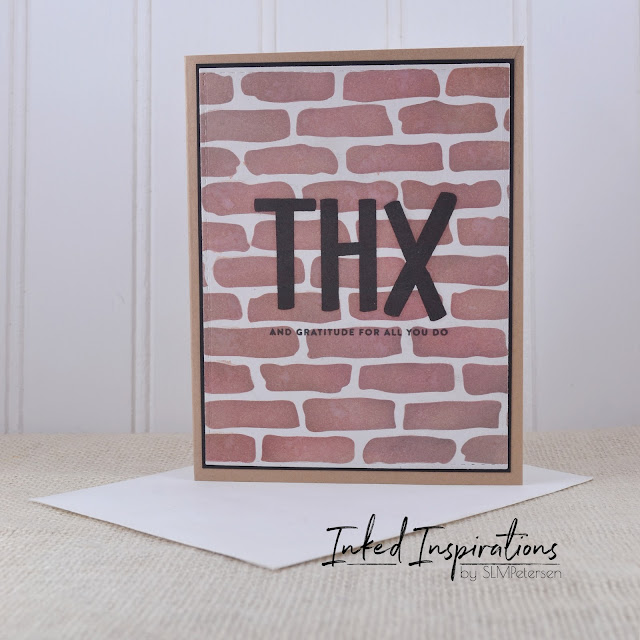
The next card was made after I watched the Scrapbook.com video The Ultimate Ink Blending Tool & Brush Comparison. The brick technique starts at around the minute 4. Using this technique and pale grey card stock I didn't need to add additional ink to the grout. I used the same brick stencil, with Distress Oxide in Aged Mahogany, Pumice Stone, and Black Soot to give the bricks a more realistic look. I splattered the bricks lightly with water and laid a paper towel over top to absorb excess water, before removing the stencil. The sentiment was stamped in VersaFine ink, then the panel was matted with black paper before being adhered to a kraft card base.


The technique is slightly different, and the use of different inks creates a slightly different look on each card. Don't be afraid to try new techniques using the inks and tools you have.
No comments:
Post a Comment